
# 介绍
svg sprite 不跟传统图片雪碧图一样是许多小图的集合。它是基于 svg,是很多 svg 的集合,每个 svg 元素都包含在标签<symbol id="xxxx"></symbol>,这样就不用像图片雪碧图一样去请求一张大图。如下面就是一个 sprite.svg 文件:
<svg xmlns="http://www.w3.org/2000/svg"
  xmlns:xlink="http://www.w3.org/1999/xlink">
  <defs>
    <symbol t="1595505780153" class="icon" viewBox="0 0 1024 1024" version="1.1" id="icon-logo">
      <path d="M680.97024 343.06048A238.26432 238.26432 0 0 0 512 273.05984c-131.93216 0-238.92992 106.97728-238.92992 238.92992S380.06784 750.94016 512 750.94016c120.29952 0 219.5968-89.05728 236.19584-204.81024H512v-68.27008h307.2v34.12992a313.1392 313.1392 0 0 1-1.9968 34.14016C800.2048 699.74016 670.12608 819.21024 512 819.21024c-169.66656 0-307.2-137.53344-307.2-307.22048 0-169.64608 137.53344-307.2 307.2-307.2 84.82816 0 161.62816 34.39616 217.23136 89.99936l-48.26112 48.27136z" p-id="3177"></path>
    </symbol>
  </defs>
</svg>
当需要新增 svg icon 的时候,只需要添加新的 svg 在 symbol 上就行,每个 symbol 都有一个 id,用于使用的时候调用。
使用的时候,需要 <use xlink:href="#xxxx"></use> 标签进行调用。当 sprite.svg 独立抽离成一个文件的时候,use 标签的格式为:<use xlink:href="/path/sprite.svg#xxxx"></use>。如:使用上面的 logo icon,格式为:
<svg width="40" height="40">
    <use xlink:href="/svg/sprite.svg#icon-logo" x="0" y="0" />
</svg>
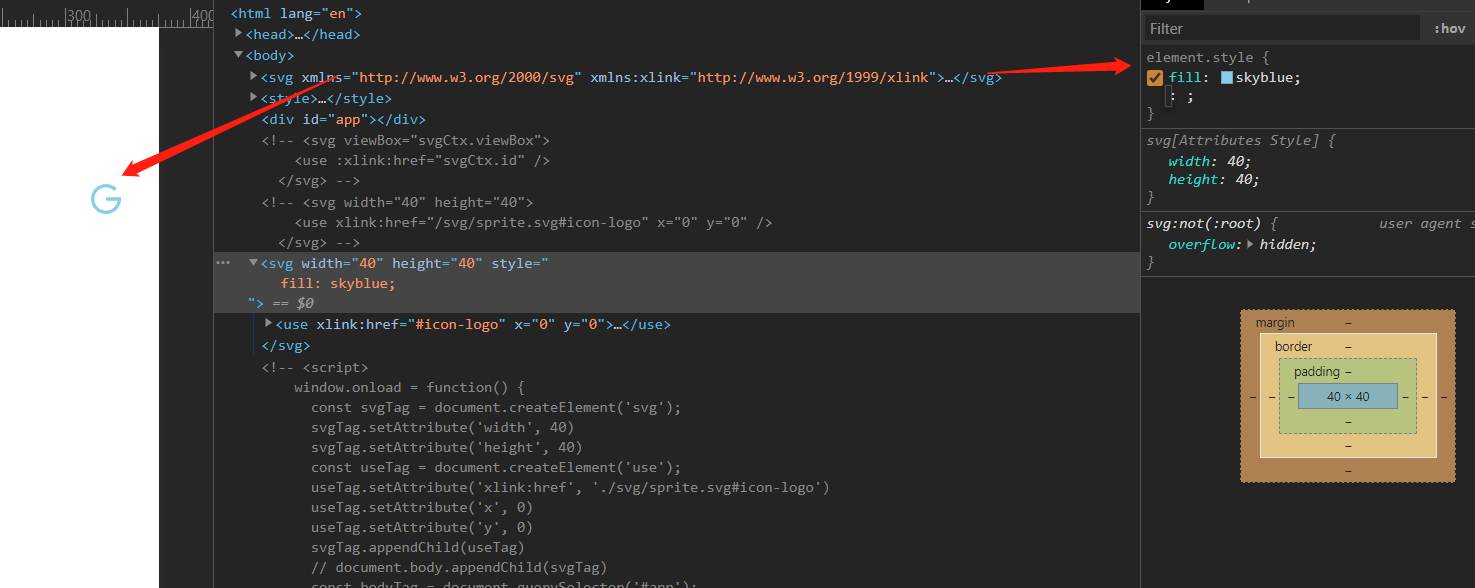
svg sprite 更加方便的是,可以通过 css 属性fill:color;直接更改颜色:
# 结合 vue + webpack 使用
主要是使用两个 loader :
- svg-sprite-loader
- svgo-loader
在 vue.config.js中添加配置配置:
- 不抽离 sprite.svg 文件为独立的文件(集成在 html 文件中),一般用于开发环境。
vue.config.js 配置:
chainWebpack(config) {
	config.module.rules.delete("svg");
	config.module
      .rule("svg")
      .test(/\.svg$/)
      .use("svg-sprite")
      .loader("svg-sprite-loader")
      .options({
        extract: false, // 默认不抽离 sprite.svg 为独立的文件
        // spriteFilename: (svgPath) => `sprite${svgPath.substr(-4)}`,
        esModule: false,
      })
      .end()
}
封装 svgIcon 组件:
<template>
  <div class="svg-icon">
    <svg :style="styleObj" :viewBox="svgCtx.viewBox">
      <use :id="svgCtx.id" :xlink:href="'#' + svgCtx.id"/>
    </svg>
  </div>
</template>

<script>
export default {
  props: {
    width: {
      type: String,
      default: "40px"
    },
    height: {
      type: String,
      default: "40px"
    },
    color: {
      type: String,
      default: ""
    },
    svg: {
      type: Object,
      default: () => {},
      required: true
    }
  },
  computed: {
    styleObject() {
      // 样式对象
      let styleObj = {};
      this.width && (styleObj.width = this.width);
      this.height && (styleObj.height = this.height);
      this.color && (styleObj.fill = this.color);
      return styleObj;
    },
    svgCtx() {
        // 兼容 import 和 require 两种模式(require 模式下默认的 svg 对象在 default 中)
        // return this.svg.hasOwnProperty("default") ? this.svg.default : this.svg;
        return this.svg.default || this.svg;
    }
  }
};
</script>
组件使用:
<template>
  <div class="svg-container">
    <svgIcon :svg="logoSvg"></svgIcon>
    <svgIcon :svg="playSvg"></svgIcon>
  </div>
</template>
<script>
import svgIcon from "../../src/components/svgIcon"
import logoSvg from "../../src/assets/logo.svg"
import playSvg from "../../src/assets/play.svg"
export default {
  components: {svgIcon},
  data() {
    return {
      logoSvg: logoSvg,
      playSvg: playSvg
    };
  },
};
</script>
效果:

- 抽离 sprite.svg 文件为独立的文件,一般用户生产环境:
修改 vue.config.js 配置:
config.module.rules.delete("svg");

config.module
  .rule("svg")
  .test(/\.svg$/)
  .use("svg-sprite")
  .loader("svg-sprite-loader")
  .options({
    extract: true,
    // spriteFilename: (svgPath) => `sprite${svgPath.substr(-4)}`,
    esModule: false,
  })
  .end()

config.plugin("svg-sprite").use(require("svg-sprite-loader/plugin")); // 抽离 sprite.svg 必需
修改 svg 组件:
<template>
  <div class="svg-icon">
    <svg :style="styleObject" :viewBox="svgCtx.viewBox">
      <!-- 指向打包后抽离的 sprite.svg 文件 -->
      <use :id="svgCtx.id" :xlink:href="'../dist/sprite.svg#' + svgCtx.id"/>
    </svg>
  </div>
</template>
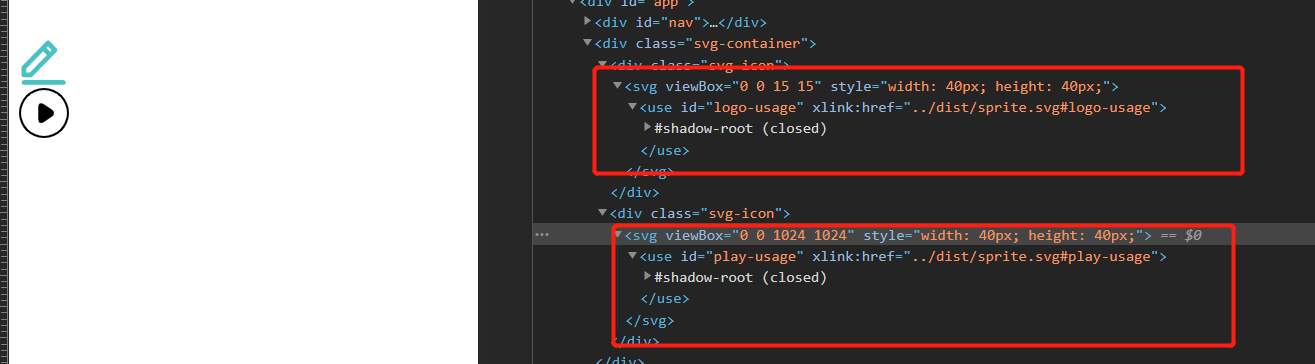
其他不变,效果如下:
思考:怎么通过环境变量将生产模式和开发环境结合起来?
# 结合开发模式和生产模式
主要解决两个问题:
- vue.config.js 中的 extract 配置:false 和 true;
- svgIcon 中
xlink:href指向问题。
通过环境变量即可。
修改 vue.config.js:
const ifProd = process.env.NODE_ENV === 'production';

// ...
extract: ifProd,
// ...
修改 svgIcon 组件:
<template>
  <div class="svg-icon">
    <svg :style="styleObject" :viewBox="svgCtx.viewBox">
      <use :id="svgCtx.id" :xlink:href="xlinkHref"/>
    </svg>
  </div>
</template>

<script>
// ...
xlinkHref() {
    const ifProd = process.env.NODE_ENV === 'production';
    const svgCtxId = this.svgCtx.id;
    // 生产环境指向打包后抽离的 sprite.svg 文件
    // 开发环境不抽离独立的 sprite.svg 文件
    return ifProd ? `../dist/sprite.svg#${svgCtxId}` : `#${svgCtxId}`;
}
//...
</script>
# 问题
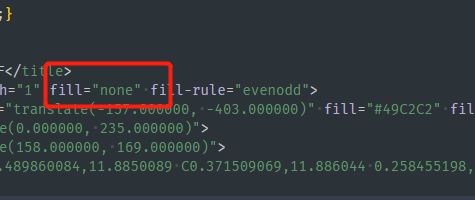
用了 svg-sprite-loader 之后,不能通过 CSS 属性 fill:color;更改颜色。是因为这个 loader 默认给 svg 添加了 fill:none; 属性,导致更改不了。
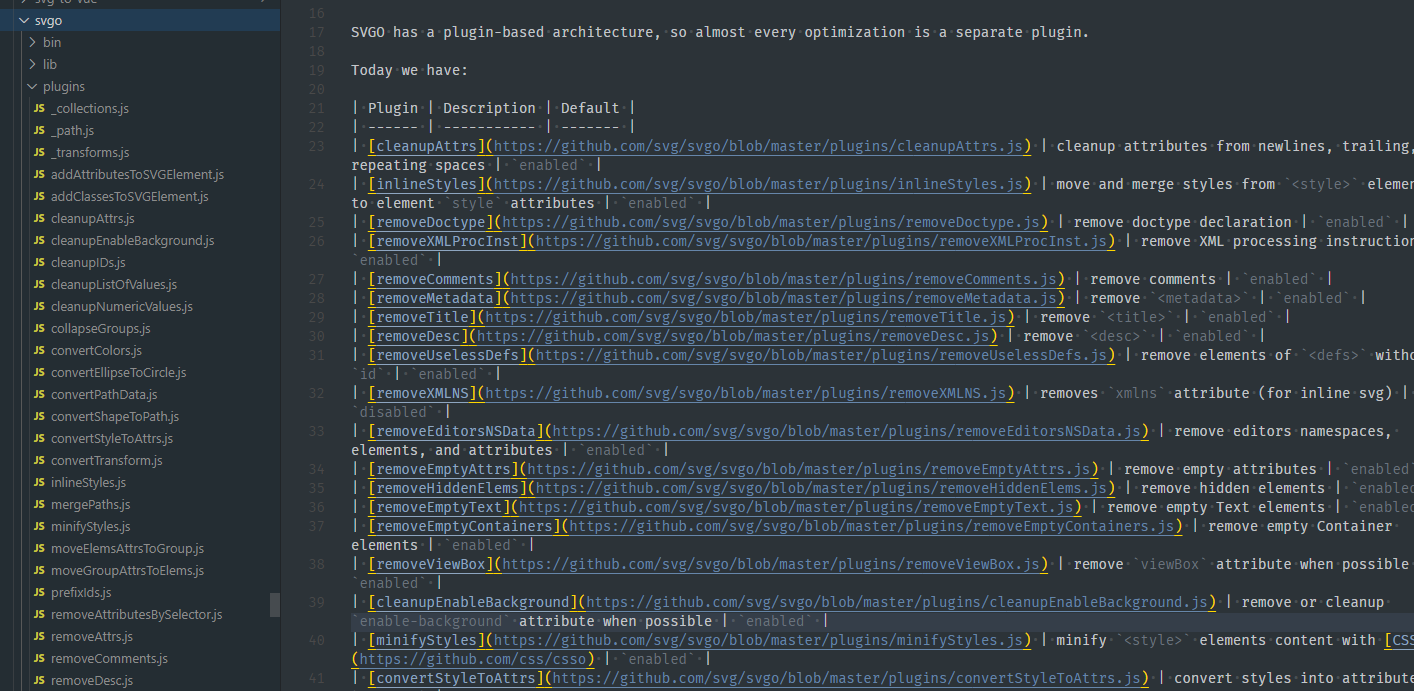
解决办法:通过svgo-loader 解决。通过这个 loader 我们可以添加很多插件,这些插件是基于 svgo,svgo 在安装 svgo-loader 的时候自动安装了。下面是 svgo 的截图:
回归正题,修改 vue.config.js 配置,去除默认加上的 fill:none; 属性:
// ...
.use("svgo-loader")
.loader("svgo-loader")
.options({
  plugins: [
    { removeAttrs: { attrs: "(fill|stroke)",  } },
  ],
})
.end();
// ...
这样,问题解决了~